While there are many variations of acceptable installation conditions and practices, FPIS is commonly applied to the exterior side of typical steel frame walls in accordance with the installation sequence shown in this animation, which also shows the use of gypsum sheathing panels underneath FPIS and the optional best-practice use of furring over the FPIS for cladding installation.
Step 1: Install FPIS to Steel-frame Wall
-
Install the gypsum sheathing or other code-compliant exterior sheathing (if required) in accordance with the building code and the sheathing manufacturer’s instructions.
-
Install and fasten FPIS panels to steel framing in accordance with the FPIS manufacturer's installation instructions.
-
FPIS panels should be butted against each other to minimize gaps between panels.
-
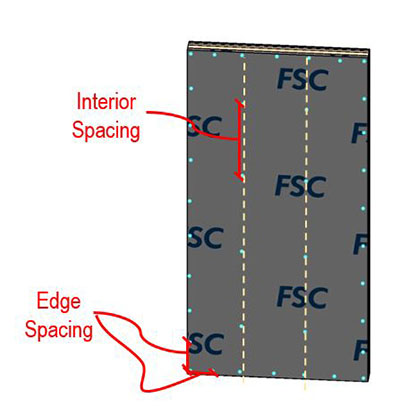
Typical FPIS fastener “interior spacing” is 16 inches on center and “edge spacing” is 12 inches on center.

-
All FPIS panel edges must be supported on a suitable sheathing substrate for screw fasteners or directly on framing members.
-
Typical fasteners are washered self-drilling, tapping screws.
-
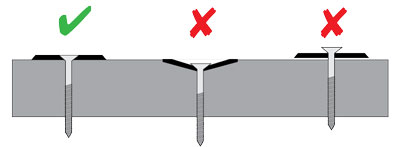
Do not over- or under-drive fasteners.
-
Washered screws should be installed with the correct degree of tightness to the surface of the FPIS panel, which is bearing firmly against the wall substrate.
-
