Editor's Note: A previous EEBS article addressed the significance of air leakage control by answering the question: What’s the big deal with air leakage?
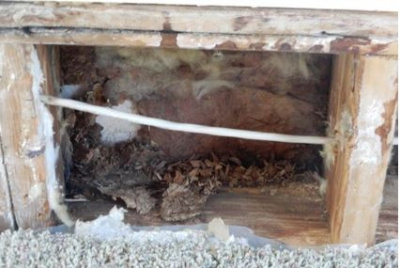
In the U.S., our understanding of air leakage through building envelopes has evolved over the course of 100 years or more. In the first application of tarred felt paper installed over 1x board sheathing in the early 1900s, it was applied to cut down on “draftiness” of conventional wood frame construction, due to gaps between board sheathing on walls and wood floor boards. This was an obvious practical matter. Since that time, things have gotten simpler and also more complex, but we are heading in the right direction. Let me explain…and this will take us through some history...
In the not so distant past, there were no air leakage provisions for buildings and this resulted in a building stock with excessive air leakage rates resulting in wasted energy, poor comfort, and other building performance issues (see previous article). With recently increased levels of insulation to improve energy efficiency and changes in building materials in relation to their moisture tolerance, the need for better air leakage control became necessary to prevent moisture problems. We’ll leave the high-moisture content and rain-water intrusion issue for another time.
It also became obvious that a proper functioning water vapor retarder was needed as buildings became better insulated, but we soon learned that a vapor retarder could not control water vapor movement if the moist air itself was bypassing the vapor retarder and getting into and through the assembly causing moisture accumulation or condensation along the way – essentially defeating the purpose of the vapor retarder.
Eventually, this progression of practical building science knowledge and the need for better air-leakage control birthed the concept of an air barrier (or air control layer) that we now find present in our modern energy codes (but is also important for the building code from a durability standpoint). This soon begged the question of what material(s) to use and where to put it (necessity is the mother of invention). This question was answered and now we have a multitude of choices for air barrier materials, methods, and locations on the assembly. A short list of options include:
- Building wraps
- Sheathing materials with sealed joints (e.g., insulating sheathing, structural sheathing, etc.)
- Fluid-applied coatings
- Spray foam
- Gypsum wall board
- Film-type vapor retarders
Some of these materials are typically located on the outside of the assembly (and may also be used as the water-resistive barrier layer). Others are located on the interior side (and may also be used as a vapor retarder). Two examples for locating the air barrier (or air control layer) are shown in Figure 1. Some are even “smart” vapor retarders that hold back water vapor (and moist air) but open up when water vapor needs to pass through or get out of the assembly (ever heard of drying potential?). So, our air barrier tool box has been greatly expanded in recent years.
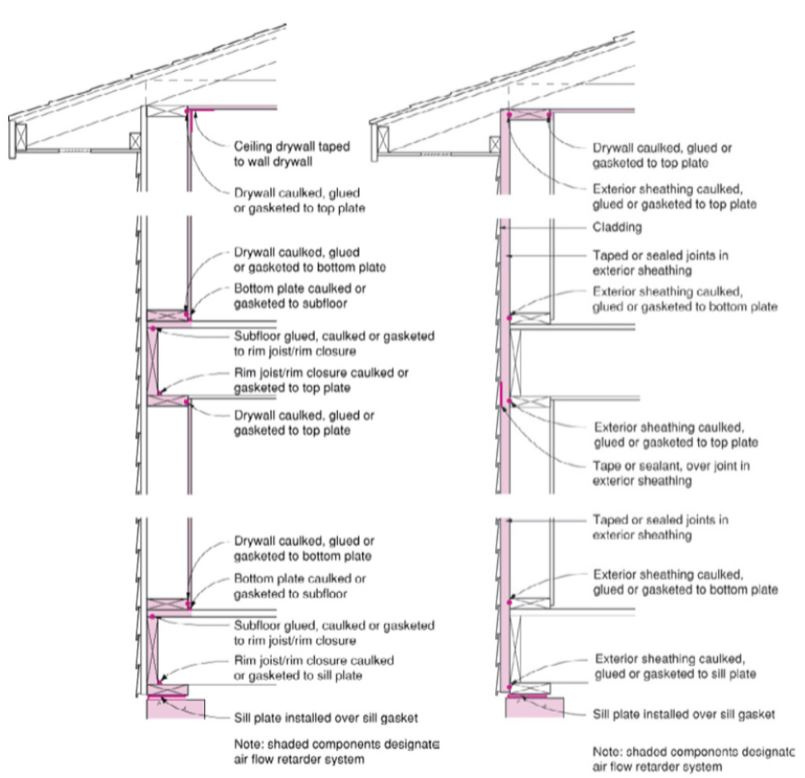
Figure 1. Interior (drywall shown) and exterior (foam plastic insulating sheathing shown) air barrier locations on a building envelope. Both are tied to the ceiling (drywall) and foundation wall for a complete air-barrier system. Source: U.S. Department of Energy Air Leakage Guide
We now have plenty of tools and no excuse for not meeting or exceeding the minimum air leakage control requirements in the current model energy code. The next article will address air barrier installation requirements (a prescriptive laundry list of action items). The final and fourth article will cap the series with the blower door test as the ultimate objective means to verify compliance. It’s also a cool tool to help find those pesky and costly leaks.
For more information on air-barriers and air-leakage control, refer to https://www.continuousinsulation.org/air-barrier.
For additional information, please review the following articles and videos:
Articles
- What’s the Big Deal with Air Leakage?
- What Caused the Air Barrier Industry to Develop?
- POV Photos – Benchmarking OSB/Foam Sheathing Moisture Performance
- Creating the ‘Perfect Wall’: Simplifying Water Vapor Retarder Requirements to Control Moisture
- Perfect Walls Are Perfect, and Hybrid Walls Perfectly Good
- Energy Code Math Lesson: Why an R-25 Wall is Not Equal to a R-20+5ci
- Continuous Insulation Solves Energy Code Math Problem
Videos
- Fear Building Envelopes No More with This Website & Videos
- Video: Thermodynamics Simplified Heat Flows from Warm to Cold
- Video: Moisture Flow Drives Water Induced Problems
- Video: How the 'Perfect Wall' Solves Environmental Diversity
- Video: How Important Is Your WRB?
- Video: A Reliably Perfect Wall Anywhere
- Video: The Best Wall We Know How to Make
- Video: How to (Not) Ruin a Perfectly Good Wall
- Video: Tar Paper and Continuous Insulation? No Problem!
- Video: Do CI and WRBs Go Together?
- Video: Assess Your 'Perfect Wall' Using Control Layers